DFT (aka Digital Film Tools) is the definitive digital toolbox meant to simulate optical camera filters, specialized lenses, film stocks and grain, lens flares, optical lab processes, color correction, keying, and compositing as well as natural light and photographic effects.
Features
General
- Simulation of optical glass camera filters, specialized lenses, film stocks, lens flares, optical lab processes, grain, exacting color correction as well as natural light and photographic effects
- 112 individual filters
- Thousands of customizable presets
Film Stocks & Looks
- 294 different color and black and white still photographic film stocks, motion picture films stocks and historical photographic processes
- 89 color grading presets from Academy Award nominated movies including 2001 A Space Odyssey, Apocalypse Now, Blade Runner, Back to the Future, Frankenstein, Gone with the Wind, King Kong, Saving Private Ryan and Titanic
- 68 stylized color and black and white looks
Lighting
- 331 optical lens flare presets organized into Anamorphic, Circular, Polygons, Star, Starburst and Stylized categories
- 193 different lighting gels to colorize your images
- Gobo library for lighting effects includes 751 gobos categorized into Abstract, Doors, Elements, Foliage, Snowflakes, Textures and Windows groups
Photo Versions
- Paint system that includes Black/White, Blur, Clone, Color, Eraser, Mosaic, Red-Eye, Repair and Scatter brushes
- Image effects including non-destructive Crop, Rotate and Scale
- Layering system for multiple filter application
- Sophisticated but easy to use masking tools
- Variation generator for effect parameters
- Batch processing
Architecture
- Color management using ICC profiles
- Exchangeable Image File Format (Exif)
- Camera RAW, TIFF, JPEG as well as Kodak Cineon and DPX file formats
- Mac Retina Display Support
- 8, 16, 32 bit image processing
- Multi-processor acceleration
- GPU acceleration
DFT Filter List
DFT is comprised of the following filters: Ambient Light, Auto Adjust, Black and White, Bleach Bypass, Blur, Borders, Cartoon, Center Spot, Chroma Bands, Chromatic Aberration, Color, Color Correct, Color Gradient, Color Infrared, Colorize Gradient, Color Shadow, Color Spot, Cross Processing, Curves, Day for Night, DeBand, DeBlock, DeFog, DeFringe, DeNoise, Depth of Field, Detail, Develop, Diffusion, Dot, Double Fog, Dual Gradient, Enhancing, Eye Light, Fan Rays, Film Stocks, Flag, Flashing, Fluorescent, Fog, F-Stop, Frost, Gels, Glow, Glow Darks, Glow Edges, Grain, Grunge, Harris Shutter, Haze, High Contrast, Hot Spot, Ice Halos, Infrared, Kelvin, Key Light, Lens Distortion, Lens Flare, Levels, Light, Looks, Low Contrast, Match, Mist, Multi-Star, ND Gradient, Net, Night Vision, Overexpose, Ozone, Paint, Pastel, Pencil, Photographic, Polarizer, Printer Points, Rack Focus, Radial Exposure, Radial Streaks, Radial Tint, Rainbow, Random Spikes, Rays, Reflector, ReLight, Selective Color Correct, Selective Saturation, Sepia, Shadows/Highlights, Sharpen, Skin Tone, Silk, Sky, Soft Light, Spikes, Spiral Rays, Split Field, Split Tone, Star, Streaks, Sunset, Telecine, Temperature, Texture, Three Strip, Tint, Tone Adjust, Two Strip, Vignette, Water Droplets, Wide Angle Lens, and X -Ray.
Requirements
Windows- Dual Core Intel or AMD processor
- Windows 7 64 bit and up
- 8GB of RAM (16GB or more recommended)
- 1GB of available disk space for caching and temporary files
- Three-button mouse or Wacom tablet
- 64 bit Intel processors
- Mac OSX 10.9 and up
- 8GB of RAM (16GB or more recommended)
- 1GB of available disk space for caching and temporary files
- Three-button mouse or Wacom tablet
- NVIDIA GTX 460 or better
- AMD Radeon 57xx series or better
- OpenCL 1.0 capable graphic card
- 1GB of graphics memory
Features
General
- Simulation of optical glass camera filters, specialized lenses, film stocks, lens flares, optical lab processes, grain, exacting color correction as well as natural light and photographic effects
- 112 individual filters
- Thousands of customizable presets
Film Stocks & Looks
- 294 different color and black and white still photographic film stocks, motion picture films stocks and historical photographic processes
- 89 color grading presets from Academy Award nominated movies including 2001 A Space Odyssey, Apocalypse Now, Blade Runner, Back to the Future, Frankenstein, Gone with the Wind, King Kong, Saving Private Ryan and Titanic
- 68 stylized color and black and white looks
Lighting
- 331 optical lens flare presets organized into Anamorphic, Circular, Polygons, Star, Starburst and Stylized categories
- 193 different lighting gels to colorize your images
- Gobo library for lighting effects includes 751 gobos categorized into Abstract, Doors, Elements, Foliage, Snowflakes, Textures and Windows groups
Photo Versions
- Paint system that includes Black/White, Blur, Clone, Color, Eraser, Mosaic, Red-Eye, Repair and Scatter brushes
- Layering system for multiple filter application
- Sophisticated but easy to use masking tools
- Variation generator for effect parameters
Architecture
- Mac Retina Display Support
- 8, 16, 32 bit image processing
- Multi-processor acceleration
- GPU acceleration
Licensing
One DFT photo plug-in license will run in Adobe® Photoshop®, Adobe Photoshop Elements®, and Adobe Photoshop Lightroom® if installed on the same machine.
DFT Filter List
DFT is comprised of the following filters: Ambient Light, Auto Adjust, Black and White, Bleach Bypass, Blur, Borders, Cartoon, Center Spot, Chroma Bands, Chromatic Aberration, Color, Color Correct, Color Gradient, Color Infrared, Colorize Gradient, Color Shadow, Color Spot, Cross Processing, Curves, Day for Night, DeBand, DeBlock, DeFog, DeFringe, DeNoise, Depth of Field, Detail, Develop, Diffusion, Dot, Double Fog, Dual Gradient, Enhancing, Eye Light, Fan Rays, Film Stocks, Flag, Flashing, Fluorescent, Fog, F-Stop, Frost, Gels, Glow, Glow Darks, Glow Edges, Grain, Grunge, Harris Shutter, Haze, High Contrast, Hot Spot, Ice Halos, Infrared, Kelvin, Key Light, Lens Distortion, Lens Flare, Levels, Light, Looks, Low Contrast, Match, Mist, Multi-Star, ND Gradient, Net, Night Vision, Overexpose, Ozone, Paint, Pastel, Pencil, Photographic, Polarizer, Printer Points, Rack Focus, Radial Exposure, Radial Streaks, Radial Tint, Rainbow, Random Spikes, Rays, Reflector, ReLight, Selective Color Correct, Selective Saturation, Sepia, Shadows/Highlights, Sharpen, Skin Tone, Silk, Sky, Soft Light, Spikes, Spiral Rays, Split Field, Split Tone, Star, Streaks, Sunset, Telecine, Temperature, Texture, Three Strip, Tint, Tone Adjust, Two Strip, Vignette, Water Droplets, Wide Angle Lens, and X -Ray.
Tech Specs / Requirements
Host Applications- Adobe Photoshop CS6 and up (64 Bit Only)
- Adobe Photoshop Elements 13 and up (Non-app store version)
- Adobe Photoshop Lightroom 3 and up
- Dual Core Intel or AMD processor
- Windows 7 64 bit and up
- 4GB of RAM (8GB or more recommended)
- 1GB of available disk space for caching and temporary files
- Three-button mouse or Wacom tablet
- 64 bit Intel processors
- Mac OSX 10.10 and up
- 4GB of RAM (8GB or more recommended)
- 1GB of available disk space for caching and temporary files
- Three-button mouse or Wacom tablet
- NVIDIA GTX 460 or better
- AMD Radeon 57xx series or better
- OpenCL 1.0 capable graphic card
- 1GB of graphics memory
Features
General
- Simulation of optical glass camera filters, specialized lenses, film stocks, lens flares, optical lab processes, grain, exacting color correction as well as natural light and photographic effects
- 126 individual filters
- Thousands of customizable presets
Film Stocks & Looks
- 294 different color and black and white still photographic film stocks, motion picture films stocks and historical photographic processes
- 89 color grading presets from Academy Award nominated movies including 2001 A Space Odyssey, Apocalypse Now, Blade Runner, Back to the Future, Frankenstein, Gone with the Wind, King Kong, Saving Private Ryan and Titanic
- 68 stylized color and black and white looks
Lighting
- 331 optical lens flare presets organized into Anamorphic, Circular, Polygons, Star, Starburst and Stylized categories
- 193 different lighting gels to colorize your images
- Gobo library for lighting effects includes 751 gobos categorized into Abstract, Doors, Elements, Foliage, Snowflakes, Textures and Windows groups
Compositing
- Compositing tricks and techniques
- Effectively composite fire, explosions and smoke
- Edge tools to color correct or blur the composite's edge
- Proprietary matte generation
- Matte manipulation using shrink, grow, blur and wrap functions
Keying
- Create mattes from blue, green, any color screen using the zMatte keyer
- Multiple matte creation
- Matte shrink, blur and wrap functions
- DV and HD deartifacting
- Sophisticated color correction and suppression
- Light wrapping
- Edge tools to color correct or blur only the edge
- Integrated transform controls
- Screen smoothing for unevenly lit blue and green screens
Architecture
- Mac Retina Display Support
- 8, 16, 32 bit image processing
- Multi-processor acceleration
- GPU acceleration
Licensing
- The DFT video/film plug-in is licensed on a per host basis. You can choose from: Adobe After Effects/Premiere Pro, Apple Final Cut Pro X/Motion, Avid Editing Systems, OFX hosts or a Multi-Host license which will run all video/film and OFX hosts on the same machine.
DFT Filter List
DFT is comprised of the following filters: Ambient Light, Black and White, Bleach Bypass, Blur, Borders, Cartoon, Center Spot, Chroma Bands, Chromatic Aberration, Color Correct, Color Gradient, Color Infrared, Colorize Gradient, Color Shadow, Color Spot, Cross Processing, Day for Night, DeBand, DeBlock, DeFog, DeFringe, DeNoise, Depth of Field, Detail, Develop, Diffusion, Dot, Double Fog, Dual Gradient, Enhancing, Eye Light, Fan Rays, Film Stocks, Flag, Flashing, Fluorescent, Fog, F-Stop, Frost, Gels, Glow, Glow Darks, Glow Edges, Grain, Grunge, Harris Shutter, Haze, High Contrast, Hot Spot, Ice Halos, Infrared, Kelvin, Key Light, Lens Distortion, Lens Flare, Light, Looks, Low Contrast, Match, Mist, Multi Star, ND Gradient, Net, Night Vision, Overexpose, Ozone, Pastel, Pencil, Photographic, Polarizer, Printer Points, Rack Focus, Radial Exposure, Radial Streaks, Radial Tint, Rainbow, Random Spikes, Rays, Reflector, ReLight, Selective Color Correct, Selective Saturation, Sepia, Shadows/Highlights, Skin Tone, Silk, Sky, Soft Light, Spikes, Spiral Rays, Split Field, Split Tone, Star, Streaks, Sunset, Telecine, Temperature, Texture, Three Strip, Tint, Tone Adjust, Two Strip, Vignette, Water Droplets, Wide Angle Lens, X-Ray and zMatte.
Requirements
Host Applications
- Adobe After Effects CS5 and up
- Adobe Premiere Pro CS5 and up
- Apple Final Cut Pro X
- Apple Motion 5
- Avid Editing Systems (64 Bit versions only)
- Assimilate Scratch v8 and up
- Black Magic Resolve v11 and up
- Sony Catalyst Edit 2015 and up
- The Foundry's Nuke v8 and up
- Vegas Pro v13 and up
Windows
- Dual Core Intel or AMD processor
- Windows 7 64 bit and up
- 8GB of RAM (16GB or more recommended)
- 1GB of available disk space for caching and temporary files
- Three-button mouse or Wacom tablet
Macintosh
- 64 bit Intel processors
- Mac OSX 10.9 and up
- 8GB of RAM (16GB or more recommended)
- 1GB of available disk space for caching and temporary files
- Three-button mouse or Wacom tablet
Recommended Graphics Cards
- NVIDIA GTX 460 or better
- AMD Radeon 57xx series or better
- OpenCL 1.0 capable graphic card
- 1GB of graphics memory
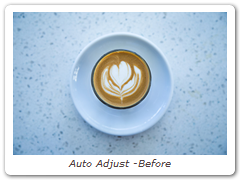
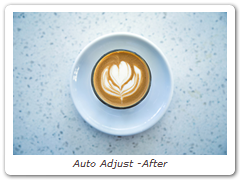
Auto Adjust
Automatically adjusts the image using Auto Color, Auto Contrast and Auto Levels processes.
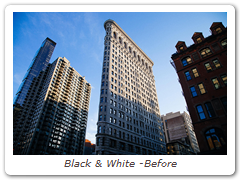
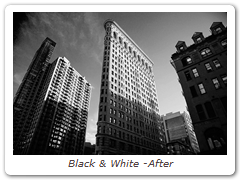
Black and White
Black and White converts color images to black and white simulating the look of Black and White photographic filters.
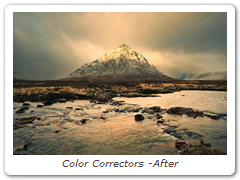
Color Correctors
DFT includes a number of different color correctors that are handy for adjusting an image’s color. They include: Color Correct, F-Stop, Printer Points, Telecine and Temperature.

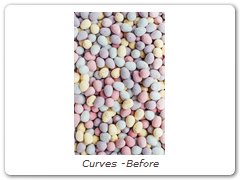
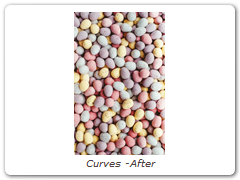
Curves
Curves adjusts the entire tonal range of an image by changing the shape of RGB, Red, Green or Blue curves. Curve points can be adjusted throughout the range of shadows to highlights.
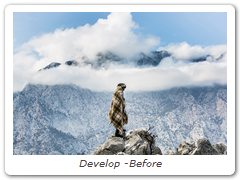
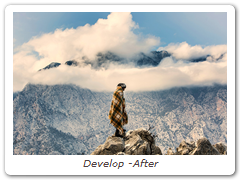
Develop
Provides useful developing controls for globally adjusting the color and tonal scale of your images.
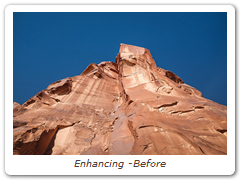
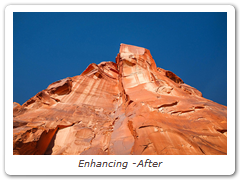
Enhancing
Selectively enhance any color to make it pop with little to no effect on other colors.
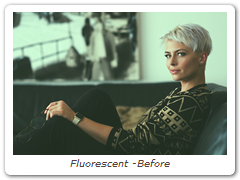
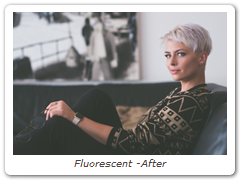
Fluorescent
Removes the green cast caused by fluorescent bulbs.
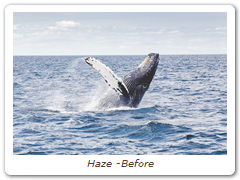
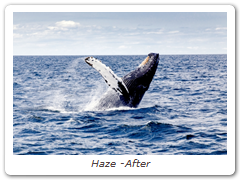
Haze
Reduces excessive blue by absorbing UV light and eliminates haze which tends to wash out color and image clarity.
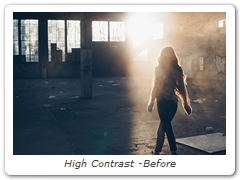
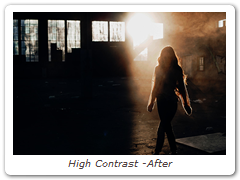
High Contrast
Creates an extreme high contrast image.
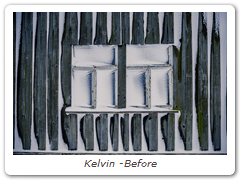
Kelvin
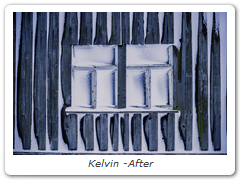
Degrees Kelvin is the standard unit of measure for color temperature which is a way to characterize the spectral properties of a light source. Low color temperature implies warmer (redder) light, while high color temperature implies a colder (bluer) light. Presets for a number of different light sources and conditions are provided in degrees Kelvin.
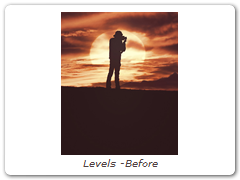
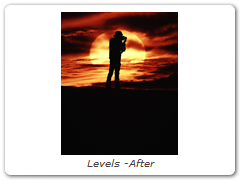
Levels
Levels is an image adjustment tool which can move and stretch the brightness levels of an image histogram. It has the power to adjust brightness, contrast, and tonal range by specifying the location of complete black, complete white, and midtones in a histogram.
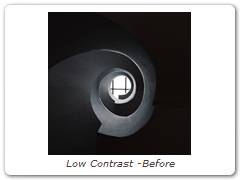
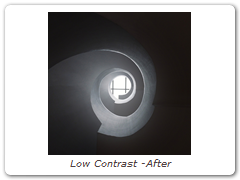
Low Contrast
Low Contrast spreads highlights into darker areas, lowers contrast and keeps bright areas bright.
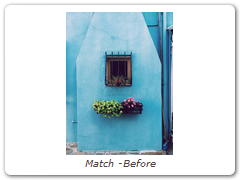
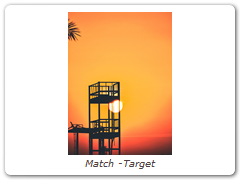
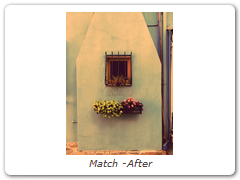
Match
Matches the brightness and color from one image and applies it to another.
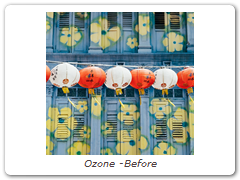
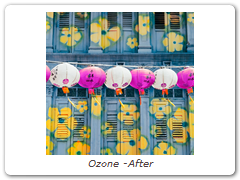
Ozone
Inspired by Ansel Adams’ Zone System for still photography, Ozone allows you to manipulate the color of an image with incredible flexibility and accuracy.
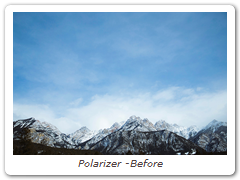
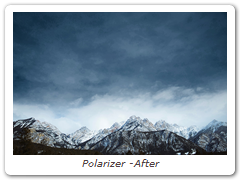
Polarizer
The greatest use of polarizing filters is to achieve a darkened, deep blue sky. Our digital version of the Polarizer is designed to do just that. Through the use of a matte and an adjustable gradient, the color of the sky can be adjusted.
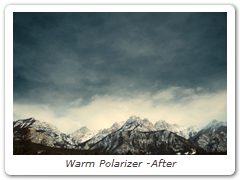
Warm Polarizer
Combines the benefits of the Polarizer with a warming filter making it ideal for portraits and scenics.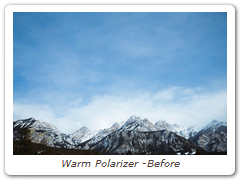
Selective Color Correct
Colors can be selectively isolated through the use of a matte and adjusted using hue, saturation, brightness, gamma, contrast, temperature, cyan/magenta, red, green, and blue controls.
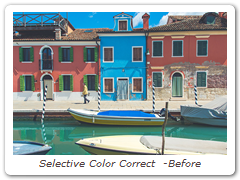
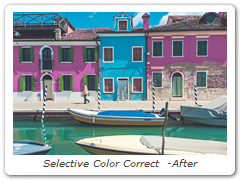
Selective Saturation
The saturation of the image can be adjusted independently in the shadows, midtones and highlights.
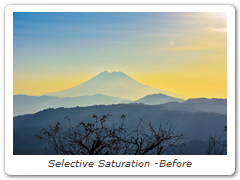
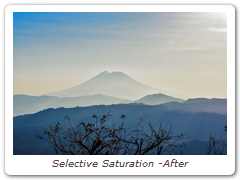
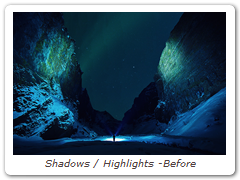
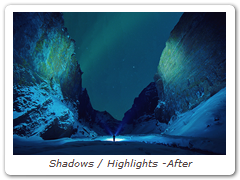
Shadows/Highlights
Shadows/Highlights lowers contrast evenly throughout the image by brightening shadow areas and darkening highlights. It is useful for correcting dark foreground subjects due to strong backlighting as well as highlights that are slightly washed out.
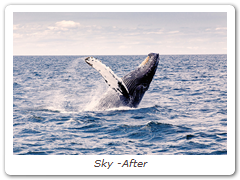
Sky
Reduces UV light, haze and is pink tinted for added warmth and better colors. It is especially useful for images shot in outdoor open shade and on overcast days.

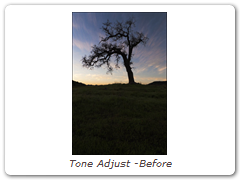
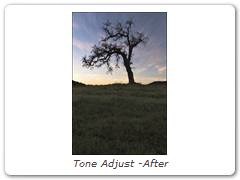
Tone Adjust
Tone Adjust approximates the appearance of high dynamic range images by adjusting the tonal values. Specifically, detail is recovered from the darker portions of the images and can optionally be denoised.
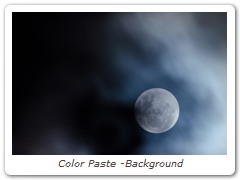
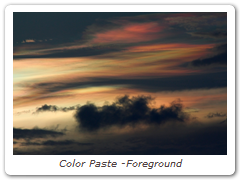
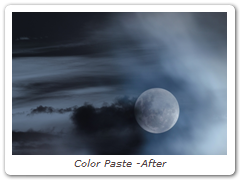
Color Paste
Color Paste takes the luminance values of the foreground image and pastes it as a color over the background.
Composite
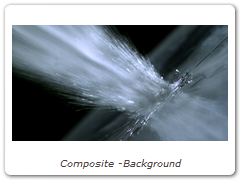
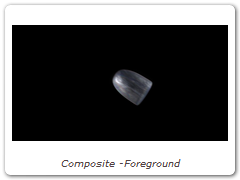
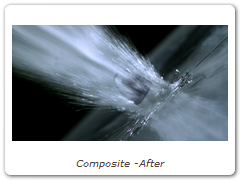
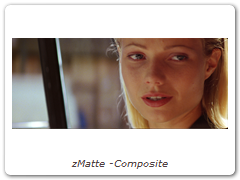
Composites a foreground over a background using a matte. Color correct, blur, grain, transform, edge and matte manipulation controls help create a seamless composite.
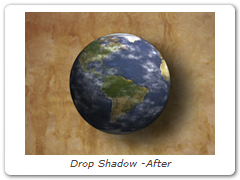
Drop Shadow
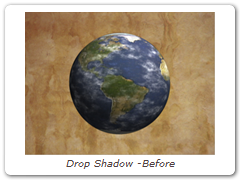
Drop shadows can be added to an image that has an Alpha channel. The opacity, color, blur and transformation of the drop shadow can all be adjusted.
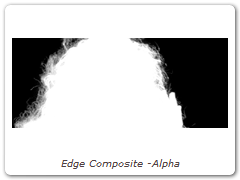
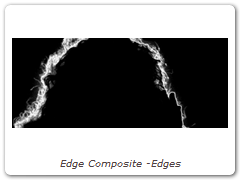
Edge Composite
Edge Composite automatically generates an edge matte from an existing Alpha channel and allows you to mix, color correct or blur only the edge of the foreground.
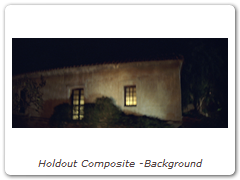
Holdout Composite
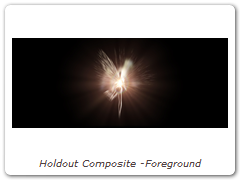
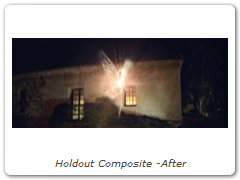
The Holdout Composite is a two-layer/track effect that realistically composites images such as fire, explosions and smoke. This filter first creates a luminance matte of the foreground and pastes it as black (or other color) over the background. You then use one of the Blend Modes to place the foreground over the held out background.
Light Wrap
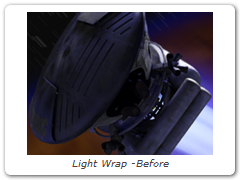
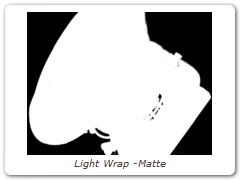
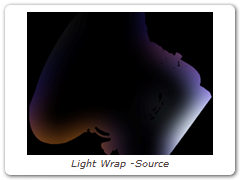
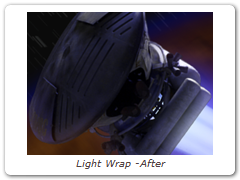
Light Wrap helps blend the foreground into the background by making the color of the background wrap into the foreground edges without softening the edge.
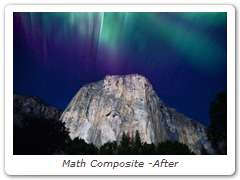
Math Composite
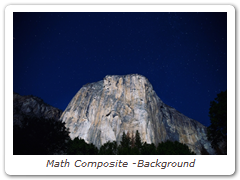
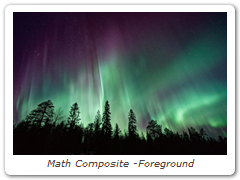
Math Composite combines two clips using one of the Blend modes. You can choose from Add, Subtract, Multiply, Screen, Difference, Darken and Lighten.
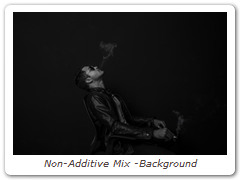
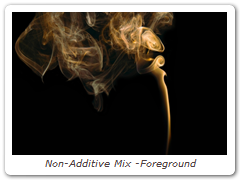
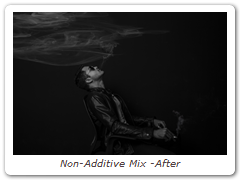
Non-Additive Mix
Known as a NAM, non-additive mix combines two images by controlling their luminance level relative to each other as well as a set mix percentage. Back in the day of video switchers and online editing, effects editors used a NAM to combine smoke and fire to another image.
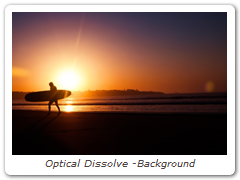
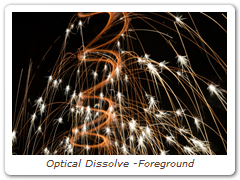
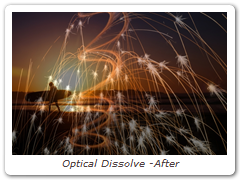
Optical Dissolve
Optical Dissolve uses a power function to simulate an optical film dissolve. The bright areas of the B side of the dissolve appear sooner than the darker areas.
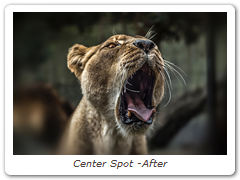
Center Spot
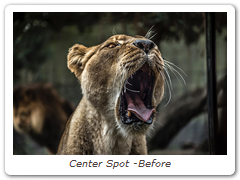
Center Spot
Diffuses and blurs distracting backgrounds while keeping a center spot in
focus. The center spot can be moved, sized and the amount of blur can be
controlled.
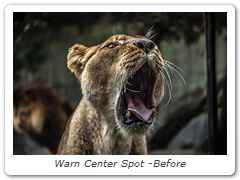
Warm Center Spot
Combines the benefits of Center Spot with a warming filter making it ideal for
portraits and skintones.

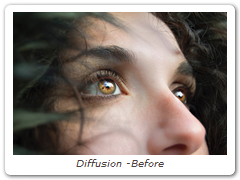
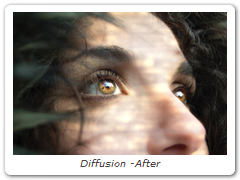
Diffusion
Diffusion creates atmosphere by reducing contrast while creating a glow around highlights or shadows using an extensive texture library.
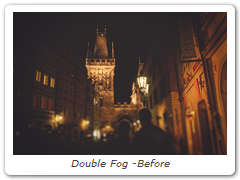
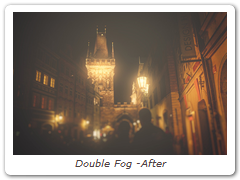
Double Fog
The Double Fog filter creates a soft, misty atmosphere over the image by first applying fog using a vanishing point along the direction of increasing distance in the image. Then, a second pass blooms image highlights.
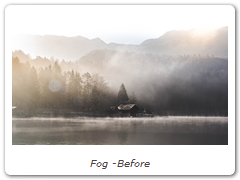
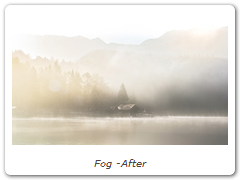
Fog
The Fog filter creates a soft, misty atmosphere over the image and glows highlights.
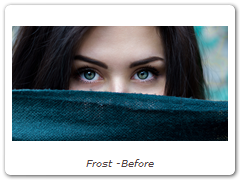
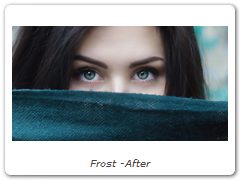
Frost
Frost
Frost glows highlights and reduces contrast while softening facial blemishes and wrinkles.
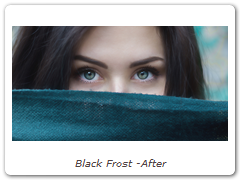
Black Frost
Black Frost offers all the benefits of the Frost filter in a more subtle form. This filter subtly controls highlights, reduces contrast and provides a harder look than the Frost filter, while suppressing facial blemishes and wrinkles.

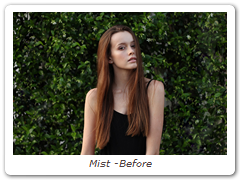
Mist
Mist
Creates atmosphere by reducing contrast while creating a glow around
highlights.

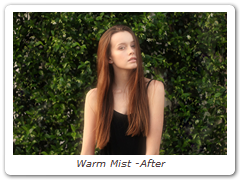
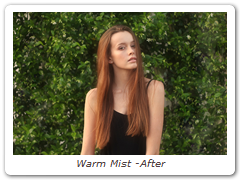
Warm Mist
Same as Mist but combined with a warming filter.

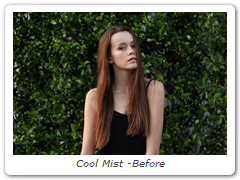
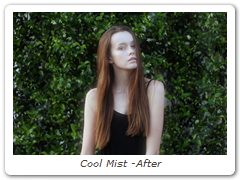
Cool Mist
Same as Mist but combined with a cooling filter.
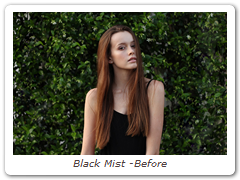
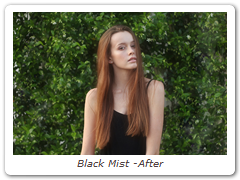
Black Mist
A more subtle version of Mist, the Black Mist filter creates atmosphere by
reducing contrast, but with minimal glow around highlights.
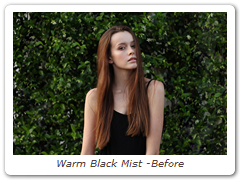
Warm Black Mist
Same as Black Mist but combined with a warming filter.
Net
Net
Softens and minimizes facial imperfections while retaining image clarity. Great
for portraits and people photography.


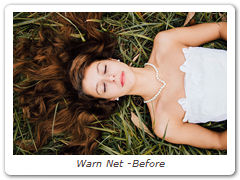
Warm Net
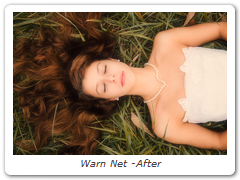
Combines all of the benefits of Net with a warming filter.
Silk
Silk
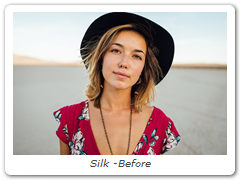
Silk softens wrinkles, blemishes and fine detail to produce smooth skin textures
while retaining detail in coarse features such as the eyes, nose and mouth.

Warm Silk
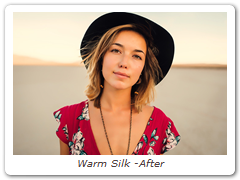
Warm Silk offers all the benefits of the Silk filter while adding a diffuse warm tint to the shadows.

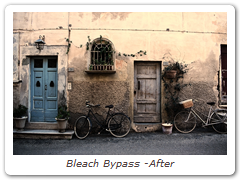
Bleach Bypass
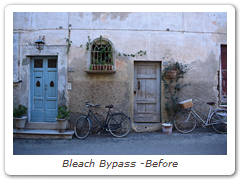
Bleach Bypass is a film laboratory technique where, by skipping the bleach stage in the color processing sequence, silver is retained in the image along with the color dyes. The result is effectively a black and white image superimposed on a color image. Bleach Bypass images have increased contrast, reduced saturation, often giving a pastel effect.
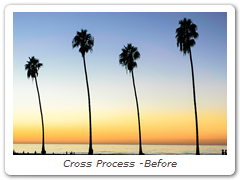
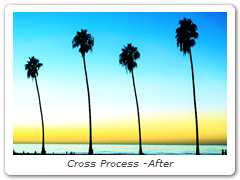
Cross Processing
Cross-processing is a photographic technique where print film (C41) is processed in the set of chemicals usually used to process slide film (E6) or vice versa. The final result yields images with oddly skewed colors and increased contrast and saturation.
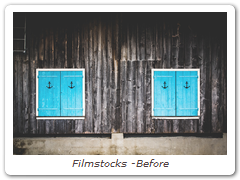
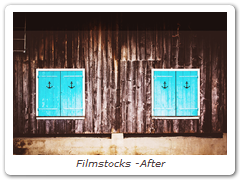
Film Stocks
Film Stocks is a unique filter that simulates 329 different color and black and white still photographic film stocks, motion picture films stocks and historical photographic processes.
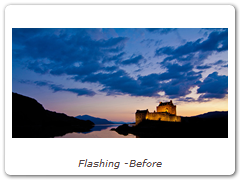
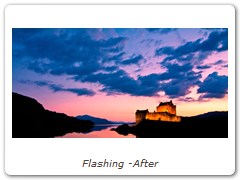
Flashing
Flashing allows you to use photographic filters to lower the contrast of your shadows or highlights.
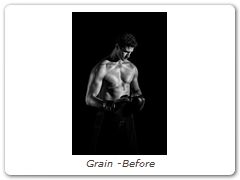
Grain
Grain simulates film grain with control of size, intensity and softness.

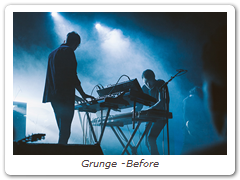
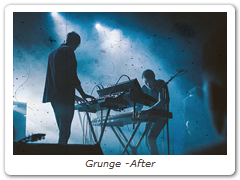
Grunge
Adds film dirt, hair, scratches, stains, splotches, gate weave, flicker, vignetting and grain--all to make your pristine image look like damaged film.
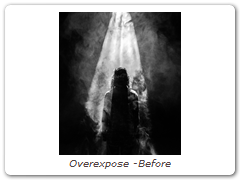
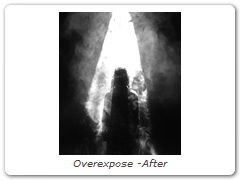
Overexpose
Overexpose simulates the overexposure that occurs when a film camera is stopped.
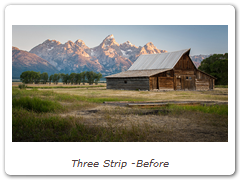
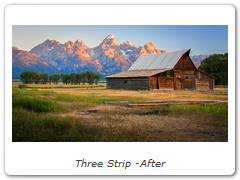
Three Strip
Known and celebrated for it ultra-realistic, saturated levels of color, the Technicolor® Three Strip process was commonly used for musicals, costume pictures and animated films. It was created by photographing three black and white strips of film each passing through red, green and blue filters on the camera lens and then recombining them in the printing process.
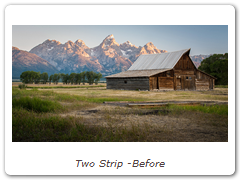
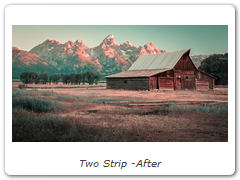
Two Strip
The Technicolor® Two Strip process was the first stab at producing color motion pictures and consisted of simultaneously photographing two black and white images using red and green filters. This look creates an odd but pleasing hand-painted look where faces appear normal and green takes on a blue-green quality, while the sky and all things blue appear cyan.
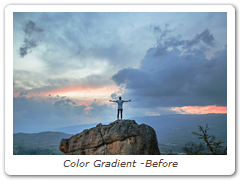
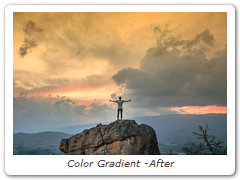
Color Gradient
Color Gradient colors and or darkens only a portion of the image giving you the ability to simulate any Color Gradient filter. It is especially useful for changing and enhancing the color of the sky.
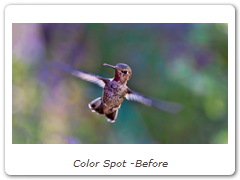
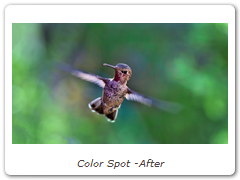
Color Spot
Tints the image using presets for common photographic filters except for a center spot which retains normal color. The center spot can be moved, sized and the amount of blur can be controlled.
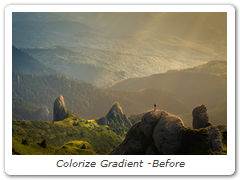
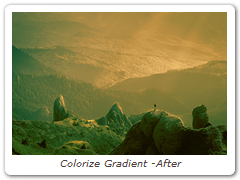
Colorize Gradient
Using multiple colors, Colorize Gradient colorizes the image according to the image’s brightness values.
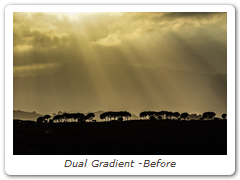
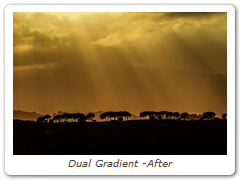
Dual Gradient
Dual Gradient applies two photographic filters to the image which are blended together with a gradient.
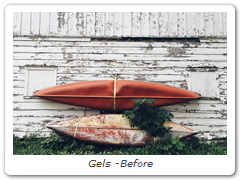
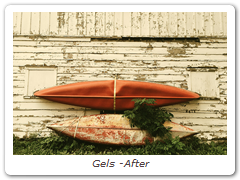
Gels
Photographers, cinematographers and lighting designers use colored filters or gels in front of lights. Whatever mood you wish to create, we have the colors needed to achieve the effect.
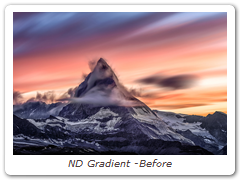
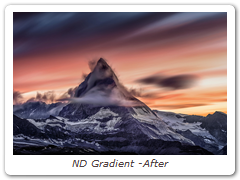
ND Gradient
ND (Neutral Density) Gradient darkens only a portion of the image using a graduated transition between the darkened portion and the original image. It selectively adjusts brightness without affecting color balance.
Photographic
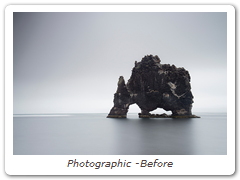
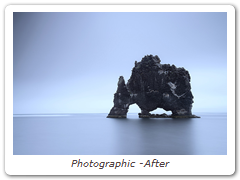
The most complete line of Kodak® filters for photographic uses is available in the form of gelatin films and are known as Wratten® Gelatin Filters. Our Photographic filter is a digital equivalent of the Wratten set and were created using the spectral transmission curves for each optical filter.
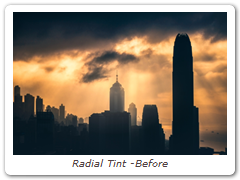
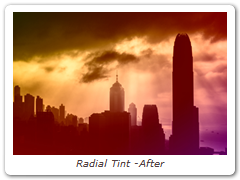
Radial Tint
Tints the image using multi-color, radially graduated filters.
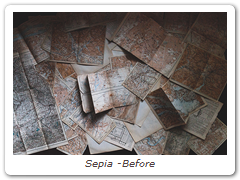
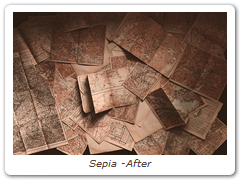
Sepia
Creates a warm brown tone for that nostalgic feeling.
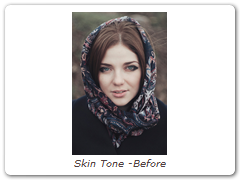
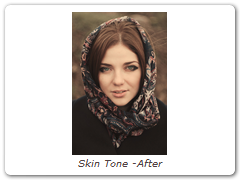
Skin Tone
A set of colorization filters to enhance skin tones.
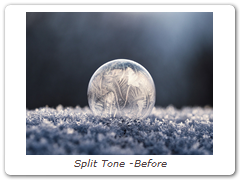
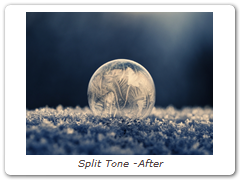
Split Tone
Shadows, midtones and highlights can be individually tinted with the Split tone filter.
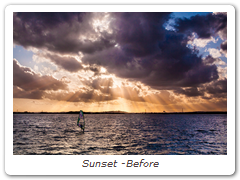
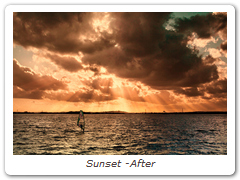
Sunset
Sunset applies three photographic filters to the image which are blended together with a gradient.
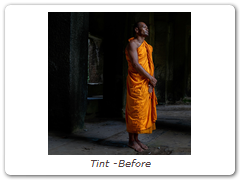
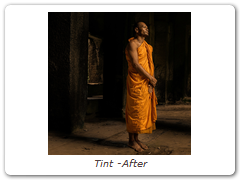
Tint
Tints the entire image with a selected color using a variety of colorization modes.
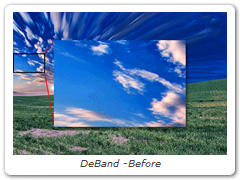
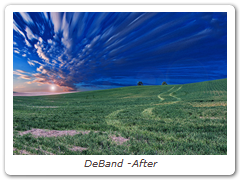
DeBand
DeBand removes banding artifacts from an image by smoothing pixels in banded areas while retaining detail.
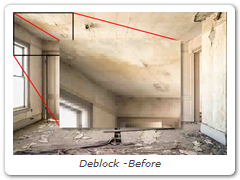
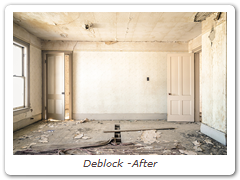
DeBlock
Blocking artifacts created as a result of high compression factors can be removed with the DeBlock filter.
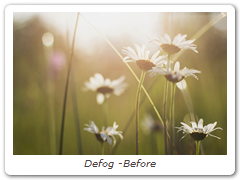
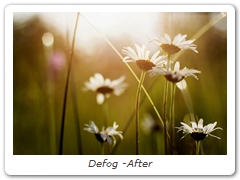
DeFog
Using advanced deweathering algorithms, Defog restores clear day contrasts and colors of a scene taken in bad weather such as fog and mist.
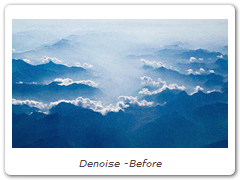
DeNoise
Removes film grain and noise.

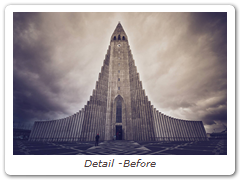
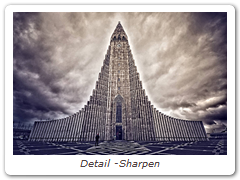
Detail
Detail presents a new technique for performing selective sharpening, detail enhancement and edge aware smoothing. Our approach decomposes the image into three detail layers: Coarse, medium and fine. Each of the detail layers can be manipulated separately in various ways, for instance, sharpening or smoothing.

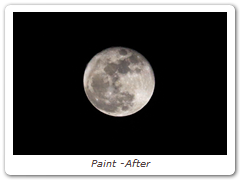
Paint
Paints your image using Black/White, Blur, Clone, Color, Eraser, Mosaic, RedEye, Repair and Scatter brushes.

Sharpen
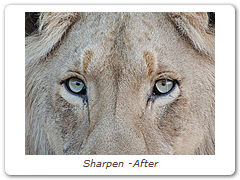
Enhances the sharpness or focus by selectively increasing the contrast between adjacent pixels along edges in an image.

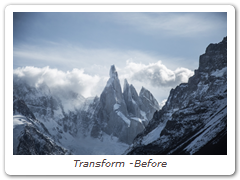
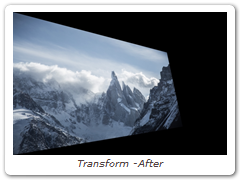
Transform
Transform an image using Position, Scale, Rotation, Corner-Pin, Shear and Crop controls.
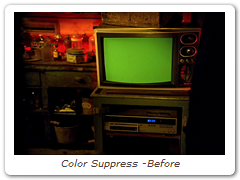
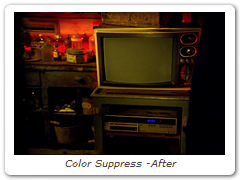
Color Suppress
Removes either blue or green from an image. This is usually used to remove the blue or green light that commonly spills onto objects filmed in front of blue or green screens.
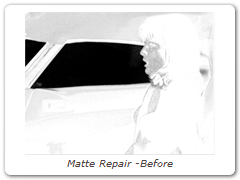
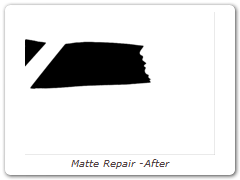
Matte Repair
Matte Repair grows, shrinks or blurs a matte. It also is handy for cleaning up impurities in the black or white areas.
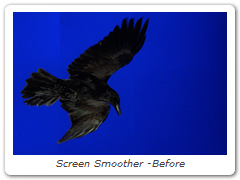
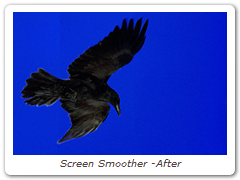
Screen Smoother
Smooths out unevenly lit blue and green screens. By default, darker screen areas are brightened. When working with poorly lit blue and green screens, it is useful to apply the Screen Smoother prior to using zMatte. This will result in a better key.
zMatte
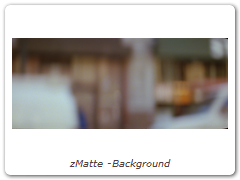
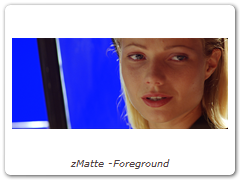
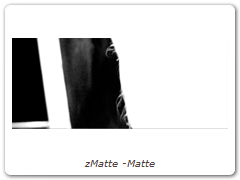
Using proprietary matte extraction techniques, zMatte quickly and simply creates mattes with minimal parameters even if you are dealing with fine hair detail, smoke, or reflections. It is easy to use, yet provides the needed tools when faced with good, bad, or ugly shots--tools such as multiple matte creation, automatic spill suppression, sophisticated matte and edge manipulation, and color correction.
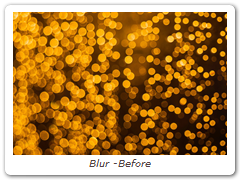
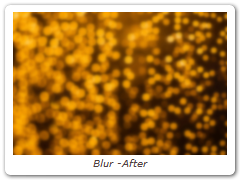
Blur
Blurs the image with individual horizontal and vertical controls. It’s fast, high quality and blurs outside the frame which removes the dark inward bleeding edges of most blurs.
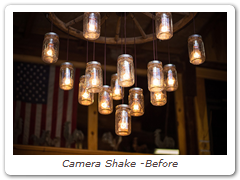
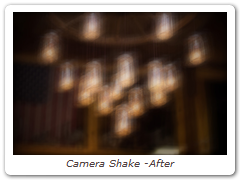
Camera Shake
Simulates camera shake using random changes in amplitude, speed, scale, rotation, and motion blur.
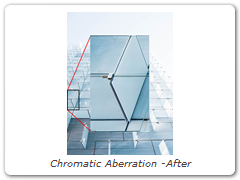
Chromatic Aberration
Chromatic aberration is caused by a lens having a different refractive index for different wavelengths of light and is seen as fringes of color around the edges of the image. This fringing is removed by un-distorting the individual color channels.

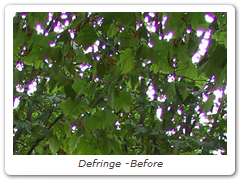
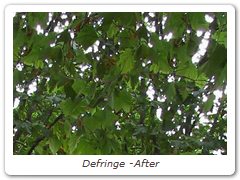
DeFringe
Purple or blue fringing around overexposed areas is a result of sensor overloading in video as well as digital still cameras. DeFringe isolates and removes the various types of color fringing.
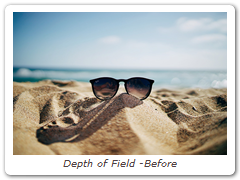
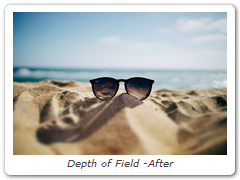
Depth of Field
Depth of Field can be added to a scene by isolating and blurring only a portion of the image. The amount of blurring is directly proportionate to the luminance of the matte settings, a gradient or an input image.
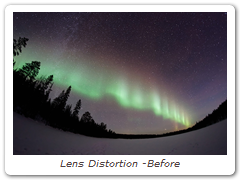
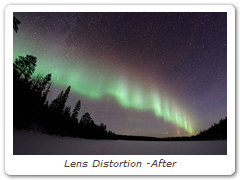
Lens Distortion
Lens Distortion corrects for pin-cushioning and barrel distortion of camera lenses. It is also useful for creating the look of a wide angle lens.
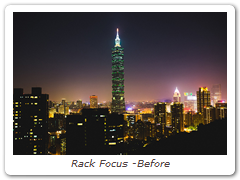
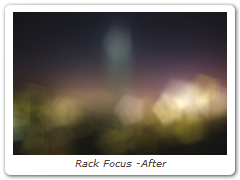
Rack Focus
Rack Focus replicates a true camera defocus by introducing lens Bokeh effects.
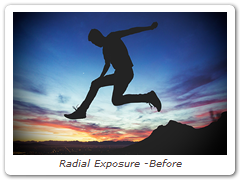
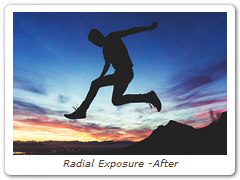
Radial Exposure
Lightens and/or darkens the center or edges of an image to correct lens vignetting.
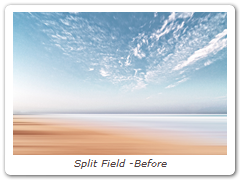
Split Field
Split Field splits the image with a line that can be positioned, rotated and blurred. On one side of the line, the image is blurred and on the other, it is in focus.

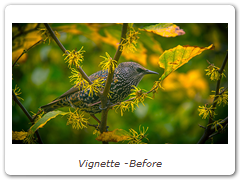
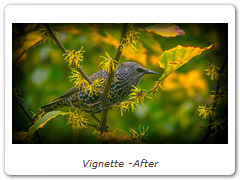
Vignette
A vignette, or soft fade, is a popular photographic effect where the photo gradually fades into the background, usually in a circular or rectangular shape. The vignette can be any color as well as thrown out of focus.
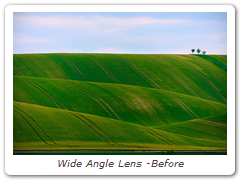
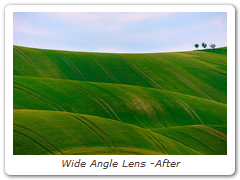
Wide Angle Lens
Simulates the effect of a wide angle lens.
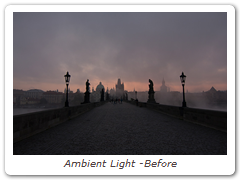
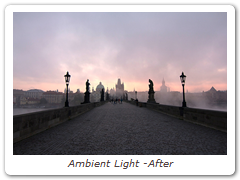
Ambient Light
Ambient creates light without a defined source and contributes to the overall brightness of a scene without casting shadows.
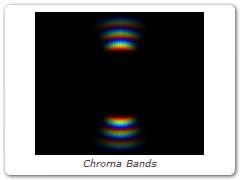
Chroma Bands
Creates rainbow diffraction patterns.
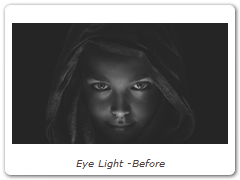
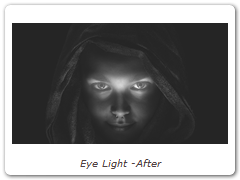
Eye Light
Creates a targeted light to be placed around a person's eyes.
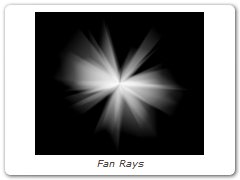
Fan Rays
Generates asymmetric fanned rays.
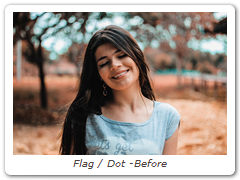
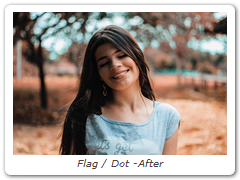
Flag / Dot
Flags and Dots are rectangular and circular lighting control devices used to create shadow areas on a motion picture or photographic set. This concept has been extended to digital so that areas of the image can be selectively darkened.
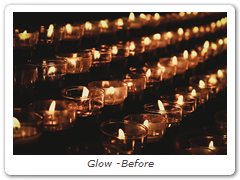
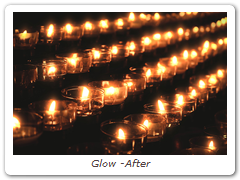
Glow
The Glow filter creates glows around selected areas of the image.
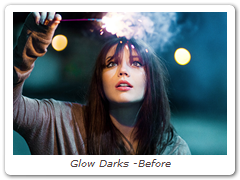
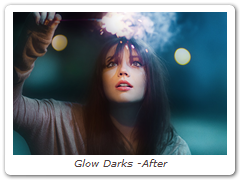
Glow Darks
Glows and grows the darks areas of the image.
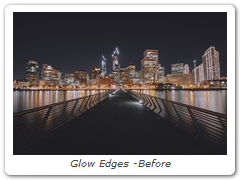
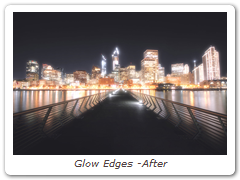
Glow Edges
Glow Edges isolates lines and edges in an image and then adds glow only to these areas resulting in a stylized look.
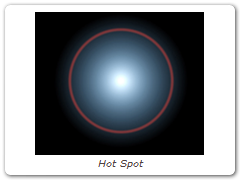
Hot Spot
Utilized in most lens flares, glow ball simulates the circular glow created when a light source interacts with a lens.
Ice Halos
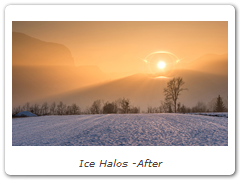
Ice halos are created when small ice crystals in the atmosphere generate halos by reflecting and refracting light. Most notably, circles form around the sun or moon as well as rare occurrences when the entire sky is painted with a web of arcing halos.

Key Light
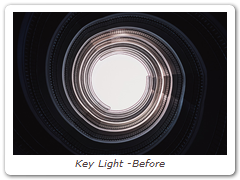
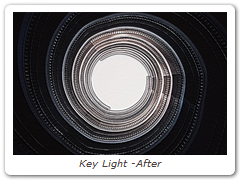
Using Key Light, an image can be relit by with either a directional or point light. The result looks natural even though the relighting is done without computing any scene geometry.
Lens Flare
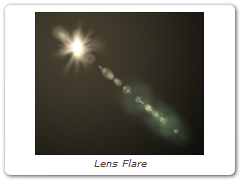
Lens flares are produced by the scattering or flaring of light within a lens when pointed into a bright light. Although an image aberration, lens flares can be added for dramatic effect and are created by combing the following elements: Caustic, Chroma Bands, Chroma Ring, Circle, Circles, Disc, Edge Streak, Ellipse, Fan Rays, Hot Spot, Polygon, Polygons, Radial Streaks, Random Spikes, Ring, Spikes, Spiral Rays, Star, Star Caustic, and Stripe.
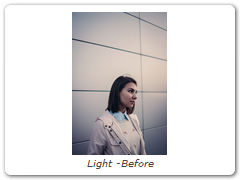
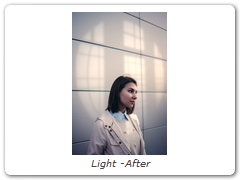
Light
Light can be added to a scene where none existed before just as if you were adding light at the time of shooting. Realistic lighting and shadow is introduced using digital versions of lighting gobos.
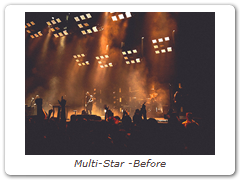
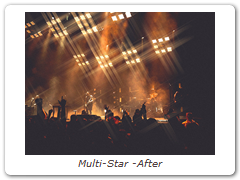
Multi-Star
User definable multi-point star patterns are generated on highlights in the image.
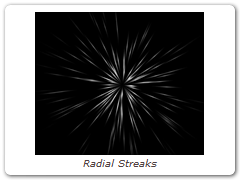
Radial Streaks
Short radial streaks emanating from the center point.
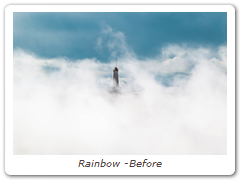
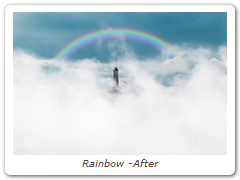
Rainbow
Recreates arced rainbows of spectral colors, usually identified as red, orange, yellow, green, blue, indigo, and violet, that appear in the sky as a result of the refractive dispersion of sunlight in drops of rain or mist.
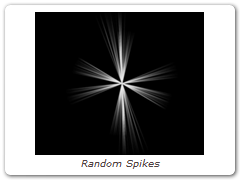
Random Spikes
Generates asymmetric radial rays.
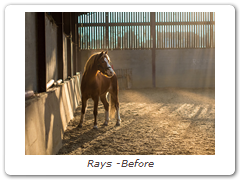
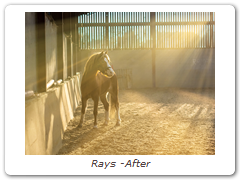
Rays
Creates stunning and realistic light ray effects quickly and easily. Known as volumetric lighting in computer graphics or crepuscular rays in atmospheric optics, this dramatic effect adds polish and style.
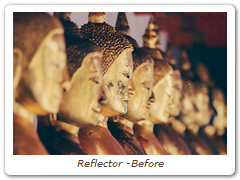
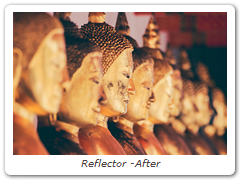
Reflector
One of the oldest and still most popular means of lighting an exterior set is by taking a reflective surface and redirecting sunlight or artificial light exactly where it is needed. Our silver and gold reflectors allow you to add white or gold light into shadow areas without the squinting.
ReLight
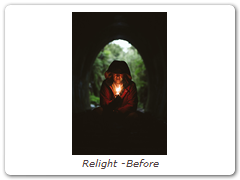
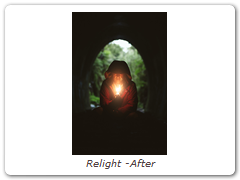
Light can be added to a scene where none existed before. A complete set of light source controls allow you to adjust the light just as you would at the time of shooting.
Soft Light
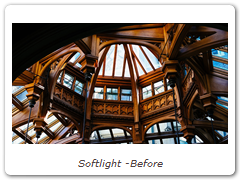
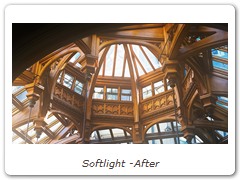
Provides soft, digitally diffused and virtually shadowless light.
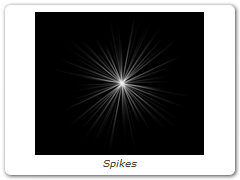
Spikes
Long radial rays emanating from the center point.
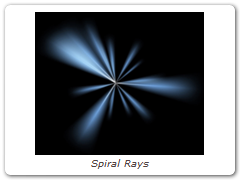
Spiral Rays
Creates spiral rays.
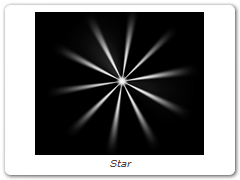
Star
A star pattern similar to those created by lens flares.
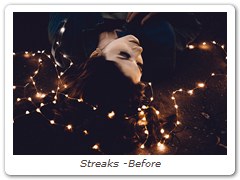
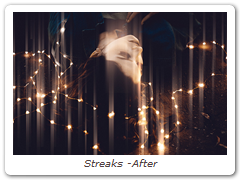
Streaks
The Streaks filter creates horizontal or vertical streaks around highlights in the image.
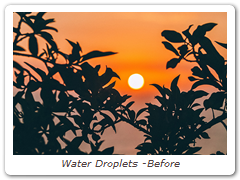
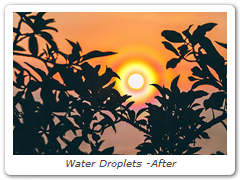
Water Droplets
Simulates the circular, rainbow colored optical effects produced by tiny water droplets in clouds, mist and fog.
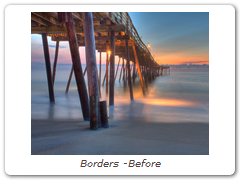
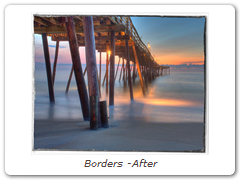
Borders
Select from a variety of different pre-made borders or create your own.
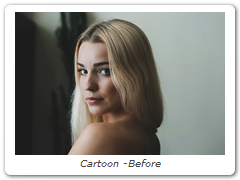
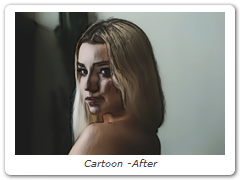
Cartoon
Converts the image into a cartoon.
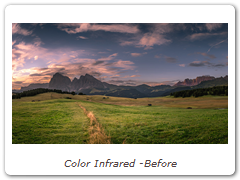
Color Infrared
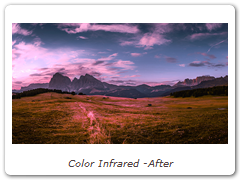
Color Infrared simulates infrared filters used in conjunction with infrared sensitive film or sensors to produce very interesting false-color images with a dreamlike or sometimes lurid appearance.
Color Shadow
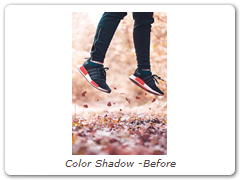
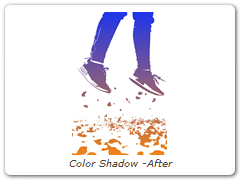
Creates a high contrast image overlayed with a gradient.
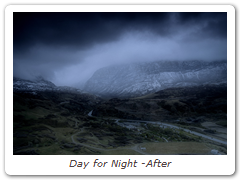
Day for Night
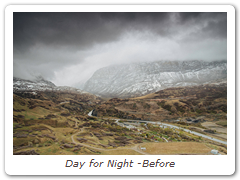
Day for Night simulates a technique used for shooting exteriors in daylight made to look like they were photographed at night.
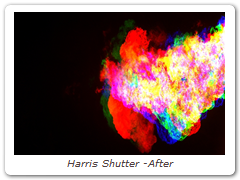
Harris Shutter
The Harris Shutter filter uses separate images for the red, green and blue channels or offsets the individual channels of a sequence in time.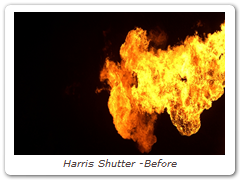
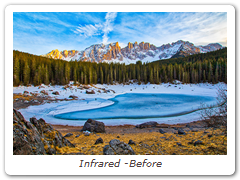
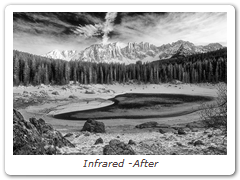
Infrared
Infrared simulates infrared filters used in conjunction with infrared sensitive film or sensors to produce very interesting black and white images with glow in highlight areas.
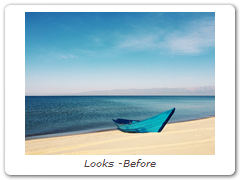
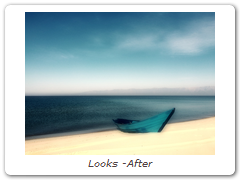
Looks
Looks is a unique filter meant to simulate a variety of color and black and white photographic/film looks, diffusion and color grad camera filters, lighting gels, film stocks and optical lab processes.
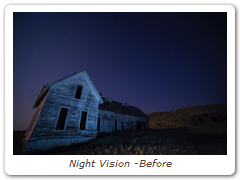
Night Vision
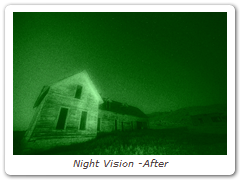
The Night Vision filter creates the effect of a Night Vision lens--that green, glowy, grainy look.
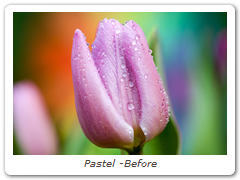
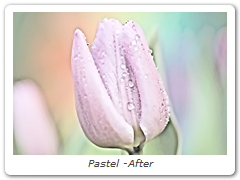
Pastel
Converts the image into pastel artwork.
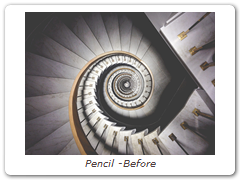
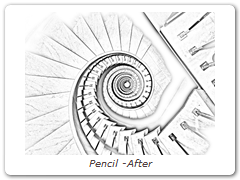
Pencil
Pencil converts your image to a pencil sketch.
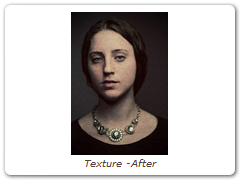
Texture
Applies textures to an image for a stylized look.

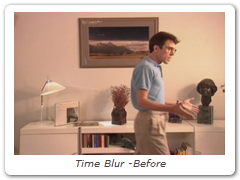
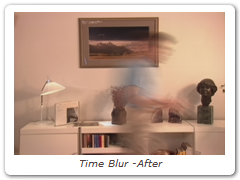
Time Blur
Time Blur mixes frames together to create interesting motion effects. This filter is also useful for smoothing out film grain and video noise which can cause problems when pulling a key or generating a matte.
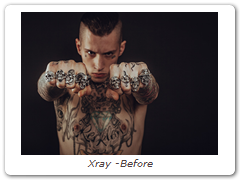
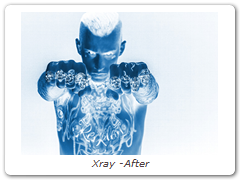
X-Ray
Simulates the look of X-Ray images.
DFT v1 Downloads
Customers upgrading to DFT v1 will receive a new activation code. Product codes from other products will NOT activate DFT.
User Guide and Tutorial
The above software contains a 15 day fully functional trial for both photo and video/film versions.
Note: Please download and test the software on your machine before purchasing. Once a permanent license has been issued, your order can not be refunded.
The software will be converted to a permanent version by purchasing a license.
Internet access required during activation / deactivation and to get a trial license.
VERSION 1.2.1.1 (MAC ONLY) RELEASED - 10/16/2019
Feature- MacOS 10.15 Compatibility
DFT is now compatible with macOS 10.15.
VERSION 1.2.1 RELEASED - 4/15/2019
Feature- Film Stocks Preset Group Consolidation
Consolidated and rearranged the Film Stocks preset groups into a single Film Stocks filter. This allows searching across all groups simultaneously.
VERSION 1.2 RELEASED 12/19/2018
Features- DFT Standalone - New Cameras Supported
- Canon EOS 5D Mark IV
- Canon EOS 6D Mark II
- Canon EOS 77D
- Canon EOS 200D
- Canon EOS 1500D
- Canon EOS 3000D
- Canon EOS M6
- Canon EOS M5
- Canon EOS M100
- Canon PowerShot G1 X Mark III
- Canon PowerShot G9 X Mark II
- Fujifilm GFX 50S
- Fujifilm HS2
- Fujifilm X100F
- Fujifilm X-A10
- Fujifilm X-A20
- Fujifilm X-A3
- Fujifilm X-A5
- Fujifilm X-E3
- Fujifilm X-H1
- Fujifilm X-T2
- GoPro HERO5 Black
- Nikon D3400
- Nikon D5600
- Nikon D7500
- Nikon D850
- Nikon COOLPIX B700
- Olympus E-PL8
- Olympus E-PL9
- Olympus E-M1Mark II
- Olympus TG-5
- Pentax K-70
- Pentax KP
- Panasonic DC-FZ80
- Panasonic DMC-FZ2500
- Panasonic DMC-LX9
- Panasonic DMC-G8
- Panasonic DC-G9
- Panasonic DC-GF9
- Panasonic DC-GH5
- Panasonic DC-GH5S
- Panasonic DMC-GX85
- Panasonic DC-GX9
- Panasonic DMC-ZS70
- Leica CL
- Leica TL
- Leica TL2
- Leica M10
- Sony DSC-RX0
- Sony DSC-RX10M4
- Sony ILCA-99M2
- Sony ILCE-6500
- Sony ILCE-7M3
- Sony ILCE-7RM3
- Sony ILCE-9
- YI M1
- Support for Tiffen Dfx Setup Files
Tiffen Dfx setup files can now be loaded. However, filters included in the setup file that don’t exist or have been renamed in DFT won’t load.
- Lightroom Mac OS Support
Lightroom is only supported in macOS 10.10 and later.
- 4K Monitor Support - Windows
The DFT user interface icons on 4K Windows displays appeared too small. - AMD Compatibility Issues
Some AMD cards crashed with certain plug-ins. - DFT UI Displayed Black In FCP With Multiple Pug-ins
The DFT user interface displayed black in FCP when there were multiple DFT plug-ins applied. - Dual Graphics Card Crash When DFT User Interface Opened
An installation with a dual graphics card caused a crash when the DFT user interface opened. - Grain > Blue Channel Did Not Animate
The Grain > Blue channel did not animate. - Film Stocks - Move Kodachrome Presets
Moved Kodachrome Presets from Color Films - Print to Color Films - Slide. - Photoshop CS6 Support
On some systems, DFT would not appear in Photoshop CS6. - Unadjusted Preset Not Highlighted
If you selected a preset, it was not highlighted if you navigated back and forth between another layer.
VERSION 1.1.1-4 (MAC ONLY) RELEASED 10/22/2018
Bugs Fixes- Lightroom OS Compatibility
The Lightroom plug-in was not compatible with Mac OSX 10.10. - Photoshop CS6 Compatibilty
The Photoshop plug-in did not launch properly in CS 6.
VERSION 1.1.1-3 RELEASED 10/17/2018
Feature- Installer Updated for Photoshop CC 2019
The installer now supports Photoshop CC 2019.
Version 1.1.1 Released 2/22/2018
Bug Fixes- DFT Interface – Avid Mac
When using a single frame extended to a longer duration, if the DFT interface was opened in the Mac version of Media Composer, the DFT interfaced crashed. - Lens Flare Crash in Photoshop
Lens Flare would crash on its second application after Softness was used. This occurred because of a Lens Flare tiling problem. - Match Crash in Photoshop
Match would crash on its second application. - Vegas CPU Mode Issues
In Vegas, when running DFT in CPU mode, 8 bit channels were swapped and demo dots would cause a crash.
Version 1.1 Released 1/18/2018
Features- 32 Bit Photoshop Support
DFT can now be applied to 32 bit images in Photoshop. - Frost Filter
A Frost diffusion filter has been added. Frost glows highlights and reduces contrast while softening facial blemishes and wrinkles. It is a combination of the Silk and Mist filters. - OpenCL GPU Support in Resolve
OpenCL GPU support in Blackmagic Design Resolve was enhanced resulting in significant speed increases. Note: Setting Resolve’s Hardware Configuration > GPU Processing Mode preference from Auto to OpenCL may be necessary on Windows systems to realize the speed increase. - Color Management
The Video/Film version of DFT now uses the OpenColorIO standard originally developed by Sony Pictures Imageworks for its color management. OCIO is compatible with the Academy Color Encoding Specification (ACES) and is LUT-format agnostic, supporting many popular formats. In DFT, you can load custom color configuration files, apply color space conversions, as well as use other controls for fine tuning. The Color Management window is opened by selecting View > Window > Color Management. -
Frame Selection in Video Browser
A Time Bar was added to the DFT user interface in Video/Film hosts. Moving the slider loads a new frame into the Viewer. Note: The Time Bar is only available in host applications that support this feature.
- Lens Flare > Flare Editor
The Lens Flare > Flare Editor button was restored in Windows versions. A recent update mistakenly removed it.
Version 1.0.4 Released 11/20/2017
Bug Fix- Missing Monitor Profile - macOS 10.13 Only
On some Macs, the default monitor profile does not exist. This caused a crash when the user interface opened.
Version 1.0.3 released 10/27/2017
Bug Fixes- Film Stocks Tiling Artifact
Fixed a tiling artificat in the Photoshop and Lightroom that occurred with certain presets and image sizes. - User Interface and Black Magic Resolve 14
The user interface intermittently opened in Resolve 14.
Version 1.0.2 released 10/18/2017
Feature- Installers Updated for Photoshop CC 2018 and Lightroom Classic CC
The installers now support Photoshop CC 2018 and Lightroom Classic CC.
Version 1.0.1 (Mac Only) Released 09/05/2017
Feature- Multiple GPU Support
DFT now runs on Macintosh computers with multiple GPU's
Version 1.0 released 09/05/2017
- Initial Release


